
Share this:
If you didn't, why not give it a try? All of this information is in there plus more!!!
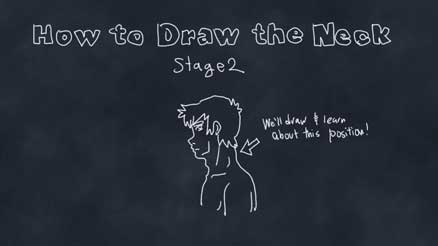
Welcome back and thanks for completing that last lesson!
Hopefully, the previous stage wasn’t too hard. Are you ready for the next stage? If so, let’s move on and draw the neck from the side.
When drawing the neck from the side, here are the things you need to take into account.
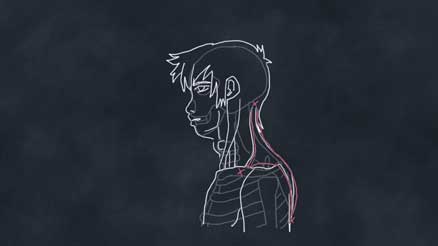
First, the spine isn’t going to be a straight cylinder anymore. It’s going to be a curved line. A lot of beginners don’t really realize just how much you spine is really curved. It’s not a slight curve, but a pretty significant curve, so be sure to take that into account when drawing it. In addition, remember that towards the base of the neck the spine sticks out a bit.

You’ll also need to take into account the windpipe and possibly the Adams apple when drawing the character from the side. For example, for a female, you could possible just get away with drawing the windpipe , which is a straight line stating at your throat going all the way down to your stomach.
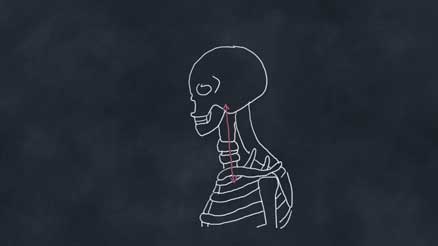
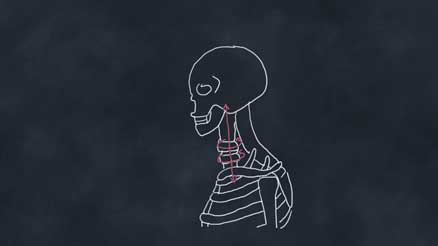
However, since this is a male, we’ll take into account the Adams apple in this drawing. You can think of it as 2 circular rings on the wind pipe. The upper one is primarily the most prominent, but sometimes you can see the lower ring as well. For example if the character has his head tilted upwards or he is a very masculine character.
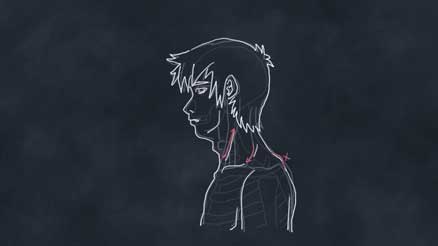
Now, let’s tackle the muscular layer. Since this is from the side, you’ll only need to draw one sternocleidomastoid. Again, this is going to be an upside y shaped muscle starting behind the ear (not in front or underneath) and ending at the collar bone.
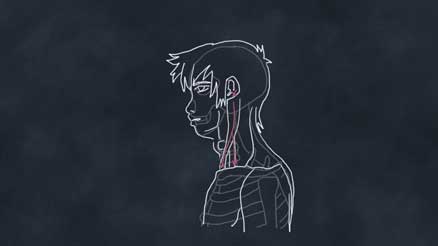
Finally draw the big trapezius muscle in the back. This starts at the back of the skull and goes all the way done to your mid back. It also wraps around a little bit and attaches to the collar bone near the shoulders.
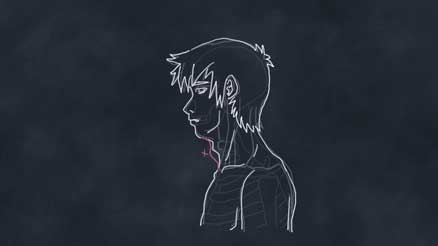
Now, all you need to do for the skin layer is trace over the muscle and bones. Remember to highlight both the trapezius and sternocleidomastoid, as well as make sure there’s a slight bump for the spine sticking out a bit.
Finally, make to draw the Adams apple if you’re drawing a masculine character.
I’ll be turning it over to you again. Good luck and I’ll be waiting for you on the stage 3!
In this lesson, we’ll be drawing the neck in 4 positions. Hopefully, this will give you a solid foundation on which to build upon when you’re drawing the neck in other ...

Welcome back and thanks for completing that last lesson! Hopefully, the previous stage wasn’t too hard. Are you ready for the next stage? If so, let’s move on and draw the ...
Welcome back and thanks again for completing that last lesson. You’re doing great so far! Keep up the good work. Now that you have drawn the neck a couple of times, hopefully you...
Welcome back and thanks for completing that last lesson. We’re almost done, so stay with me for just a little longer! For the last drawing, let’s draw the neck from the front again, ...
You can get in touch with me using the following button!
Send Me a Message!


A Personal Thank You from Yamada
Hi, my name’s Yamada and I wanted to take this time to personally THANK YOU for visiting this site and taking an interest in this school. It really means a lot to me that you’re giving me this chance to help you and I’m going to make sure it’s worth your time.
Through this school, I’m going to teach you everything I know about drawing. From anatomy to perspective, my goal as your friend is to create a series of lessons that you can easily follow to become an awesome artist!
However, a school is nothing without its students. Thus, I really need your help more than you need mine. Please let me know your thoughts on this school. Your feedback is very important to me, this school, and other students. Together, let’s turn this into the most awesome thing on the internet!
Your friend,
Yamada

Don’t you think we’d be AWESOME friends!?
Please let me know who you are using the following links!


