
Share this:
If you didn't, why not give it a try? All of this information is in there plus more!!!
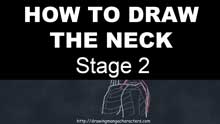
In this lesson, we’ll be drawing the neck in 4 positions. Hopefully, this will give you a solid foundation on which to build upon when you’re drawing the neck in other positions. Since we’re also just focusing on the neck, I’m going to fill in the parts that won’t be covered in this lesson like the head and torso.
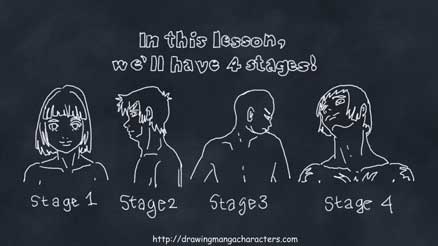
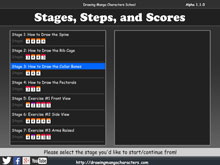
For the first stage, let’s focus on the neck from the front.
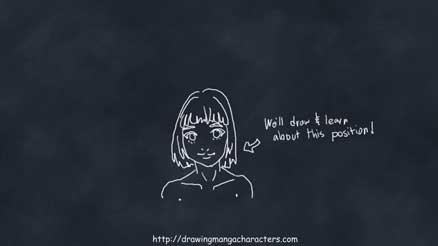
When drawing the neck from the front, there are only a few things you need to know.
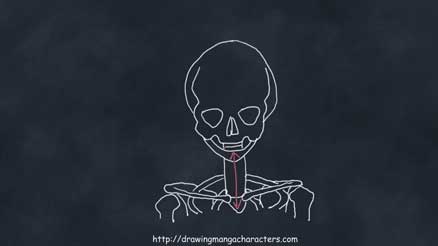
Let’s start with the skeletal layer. Luckily for us, there’s only 1 group of bones we need to draw for the neck — the spine. From the front, drawing the spine is easy as it’s just going to be straight line.
So, let’s move onto the muscular layer.
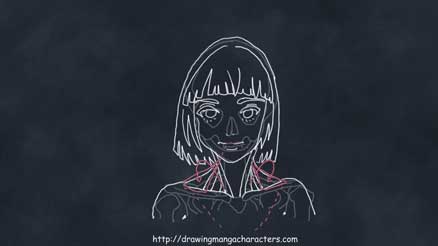
For the muscles, remember that there are 2 important muscles that you need to take into account. The first one is the sternocleidomastoids. These are the muscles that look like they are 2 upside y’s starting behind the ear and ending at the collar bone. Be sure to draw them as 2 upside y’s and not 2 lines. Recall, these 2 crevices will become important when shading the neck. Although Not so much in this position, it’s good to get in the habit.
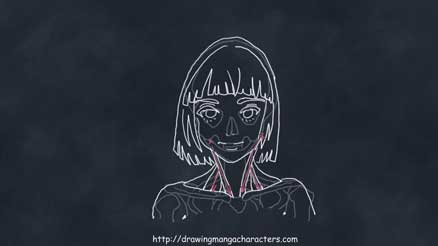
Once you have that done, draw in that big trapezius muscle in the back. Again, this muscle is so big it sticks out from both sides of the neck and wraps around toward the front near the shoulders. It’s what gives the neck its curved appearance.
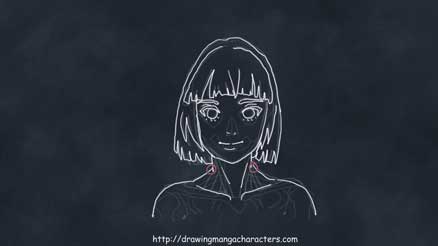
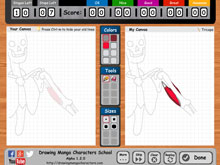
Now, all we need to do is draw the skin layer. To do this, we’re going to trace over outline of the muscles and bones and highlight a few muscles. You don’t want to get too carried away with this though, unless you’re drawing a body builder. Since this is a female, we’re going to trace over the outline and draw 2 slight lines for the sternocleidomastoids.
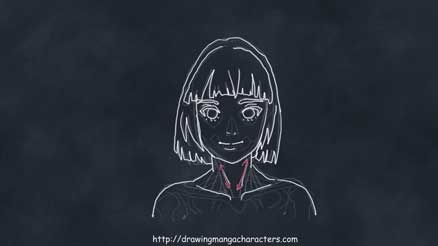
One key point to remember is to make sure you don’t connect the sternocleidomastoid and trapezius muscles together. These are 2 different muscles going in two different directions. You need to have this small indentation here to show that.
Now, I’m going to turn the reins over to you and let you draw it. Once you’re finished, I’ll be waiting for you on the other side! Good luck.
In this lesson, we’ll be drawing the neck in 4 positions. Hopefully, this will give you a solid foundation on which to build upon when you’re drawing the neck in other ...
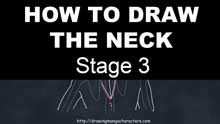
Welcome back and thanks for completing that last lesson! Hopefully, the previous stage wasn’t too hard. Are you ready for the next stage? If so, let’s move on and draw the ...
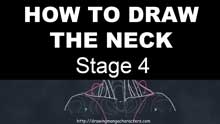
Welcome back and thanks again for completing that last lesson. You’re doing great so far! Keep up the good work. Now that you have drawn the neck a couple of times, hopefully you...
Welcome back and thanks for completing that last lesson. We’re almost done, so stay with me for just a little longer! For the last drawing, let’s draw the neck from the front again, ...
You can get in touch with me using the following button!
Send Me a Message!

A Personal Thank You from Yamada
Hi, my name’s Yamada and I wanted to take this time to personally THANK YOU for visiting this site and taking an interest in this school. It really means a lot to me that you’re giving me this chance to help you and I’m going to make sure it’s worth your time.
Through this school, I’m going to teach you everything I know about drawing. From anatomy to perspective, my goal as your friend is to create a series of lessons that you can easily follow to become an awesome artist!
However, a school is nothing without its students. Thus, I really need your help more than you need mine. Please let me know your thoughts on this school. Your feedback is very important to me, this school, and other students. Together, let’s turn this into the most awesome thing on the internet!
Your friend,
Yamada

Don’t you think we’d be AWESOME friends!?
Please let me know who you are using the following links!


