
Share this:
If you didn't, why not give it a try? All of this information is in there plus more!!!
Welcome to the first lesson of the drawing manga characters school. In this lesson, we’re going to go over the neck.
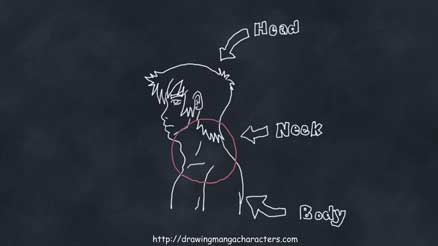
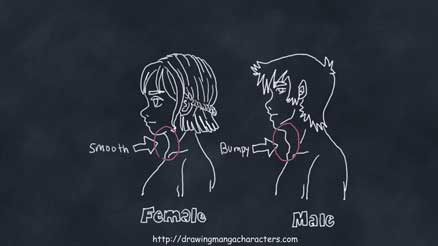
The neck, as most of you know, connects your head to your body. It allows your character to move and rotate its head, as well giving your character a more feminine or masculine appearance. As such, it’s very important to both your drawing and character.
Unfortunately, it is also one of the most overlooked parts of the human body. Which is strange because the adjacent body parts (the head and torso) get an enormous amount of attention?
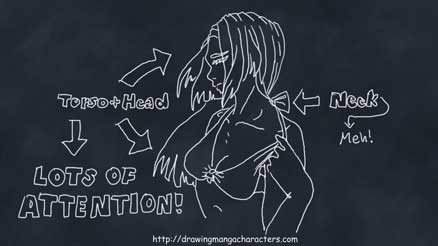
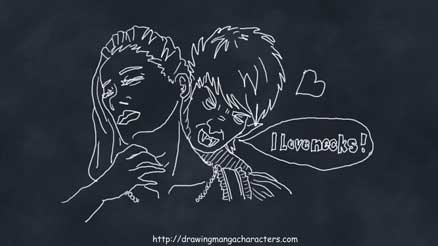
However, this shouldn’t be the case. The neck should get as much attention as any other part of the human body. And to be honest, it might even deserve more. There’s a reason why most vampires and blood sucking demons find it irresistible (other than the fact that are its home to some of the main arteries).
So, what typically happens when the neck gets overlooked? Most of the time, it becomes two parallel lines going from somewhere on the head to somewhere on the torso.
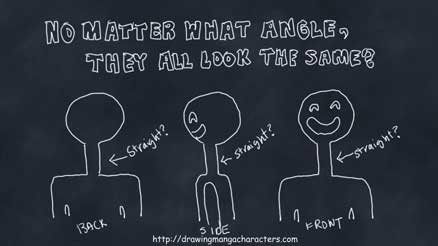
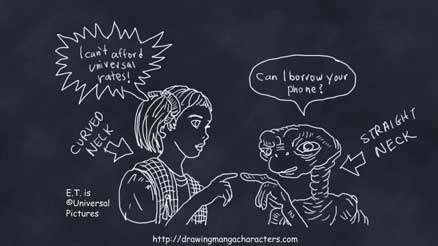
Now, I don’t know about you, but this just doesn’t look right to me. Unless you’re drawing something like ET, the human neck just doesn’t look like this.
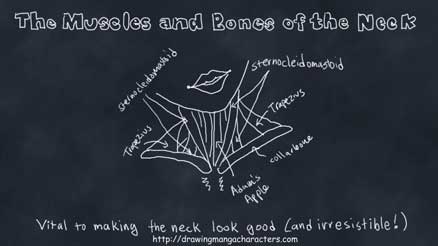
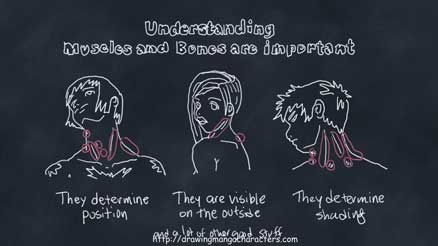
The reason why this approach doesn’t work is because there are several muscles and bones that make up the neck that give it that distinct appearance. Without understanding those it’s very hard to draw it accurately.
So, let’s break it down one major component at a time and understand what the neck is and how it works. Once you do that, you’ll have no trouble drawing the neck at any angle and direction you want.
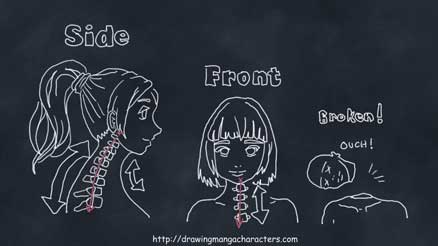
For starters, let’s take a look at the skeleton. One of the primary reasons why the neck isn’t straight (or 2 parallel lines) is because the bone that goes through it called the spine isn’t straight. It’s actually slightly curved, guaranteeing that the neck will be curved as well. You can see this when looking at the character from the side.
However, the curvature of the spine is only prominent when looking at the character from the side or angle. When looking at a character from the front or back, the spine is primarily a straight line (unless you hurt yourself really bad and if so, please call an ambulance).
So, what gives the neck its distinct curves when looking at it from the front and back? The answer is a huge muscle in the back called the trapezius. This muscle is big enough that you can see it sticking out from the front on both sides of the neck. It’s these protrusions that what give the neck its curved appearance from the front or back.

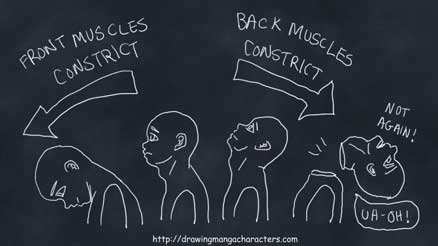
When talking about muscles, it is sometimes better to think of them in pairs as opposed to separate entities. Take the trapezius muscle mentioned earlier. When this muscle constricts, it helps pull the head backwards, but it isn’t really responsible for pulling the head forward. That is the job for another set of muscles called the sternocleidomastoids. However, these muscles work together to move the head back and forth and form a pair.
This scenario applies to almost every muscle in the body. Each muscle has an opposing muscle that will undo what it has done. Otherwise you wouldn’t be able to go back to your original position and bad things will happen.
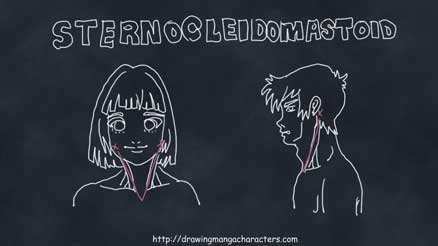
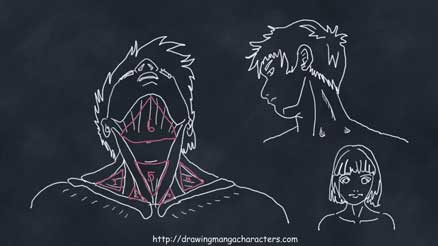
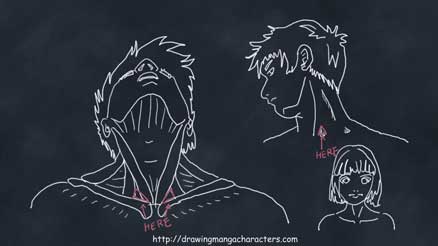
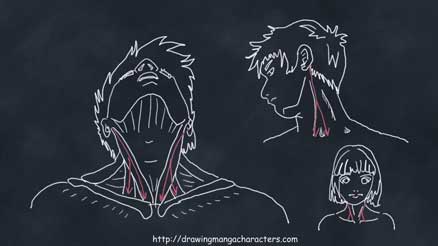
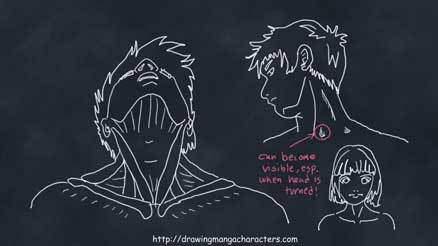
Let’s get back to the sternocleidomastoids. These muscles are a pair of muscles located in the front of the neck. They originate from behind the ear and terminate at the collarbone forming a v shape pattern that is quite visible depending on how the character is positioned and rotated.
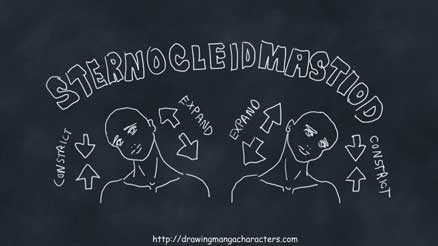
When they constrict, they’ll help pull the head forward and back into position. When they constrict a lot, they’ll pull the head even further down. Since the sternocleidomastoids are a pair themselves, they can also tilt the head sideways if only one of them constricts.
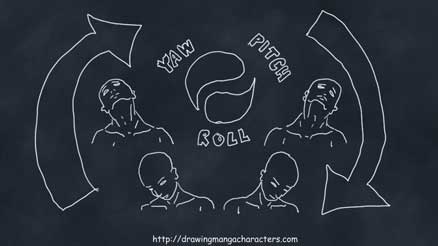
By varying the constrictions of all these muscles, the head can swivel and rotate in almost any direction.
When drawing a character, it is important to take these muscles into consideration. Not only do they determine how a character’s head is positioned, but they also become more prominent on the outside when stretched and constricted. For example, if you turn your head right or left, a lot of these muscles are going to stand out because they in use.
Now I know there are a lot of other smaller muscles in the neck besides the trapezius and sternocleidomastoids, but for the most part these 2 are the most important when drawing.
Moving on to the skin, there are a few key points to consider (especially if you’re trying to shade the neck).
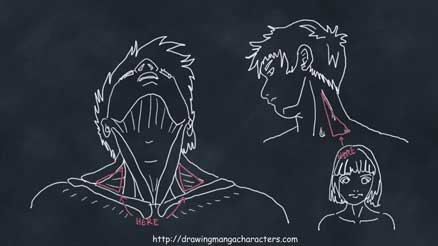
The muscles in the neck form various hills and valleys. Basically there are 6 triangular indentations (or hills and valleys) that you need to be aware of when drawing the skin.
The first 2 triangles are the result of the sternocleidomastoids. Although I mentioned earlier that the sternocleidomastoids formed a v pattern, they actually look more like 2 upside ys forming a v pattern. These tips will form the first 2 triangles and can become highly visible when looking left or right depending on the character.
The next 2 triangles are the result of the trapezius muscle, sternocleidomastoids, and collarbone. The areas between the 3 will create an indentation that is visible from the outside regardless of whether the neck is moving or stationary. However, if you turn your head left or right, the entire area might become more prominent and indented.
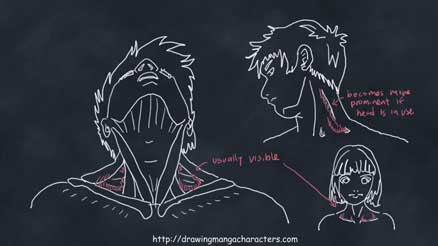
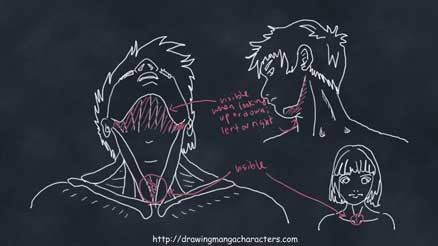
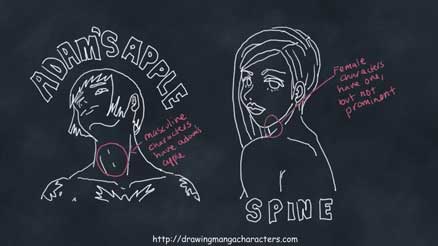
The last 2 triangles are the result of the area above and below the Adams apple. The lower triangle is prominent in almost all characters even when the neck is stationary. Usually, the spot where it’s most prominent is the area towards the base of the neck near the collarbone.
The upper triangle, on the other hand, isn’t so much unless you are looking at the character from below or the character’s head is tilted backwards or sideways. In those cases, the area between the jaw and the windpipe will create an indentation.

Last, let’s highlight two more things that pertains to the neck, the Adams apple and spine.
Although not a muscle or bone, the Adams apple plays a very important part in a drawing. This is especially true in more masculine or skinny characters. In these types of characters, the Adams apple will be visible even in the relaxed state.
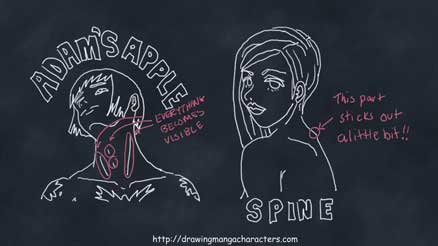
However, that doesn’t mean feminine and chubbier characters don’t need one. Even in those characters, there are situations in which you’ll need to draw it. For example, if you tilt your head all the way back, almost everything in your neck will become high visible including the Adams apple.
Finally, the spine also needs to be taken into consideration when drawing the neck. Although most of it is covered up by muscles, there is a small segment that sticks out from your skin at the base of the neck in the back. Typically, you’ll only need to draw 1 or 2 small bumps to show this, but depending on the character you might need to draw more bumps. For example, you might draw more if you’re trying to depict a really skin person or someone bending over.
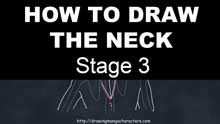
In this lesson, we’ll be drawing the neck in 4 positions. Hopefully, this will give you a solid foundation on which to build upon when you’re drawing the neck in other ...
Welcome back and thanks for completing that last lesson! Hopefully, the previous stage wasn’t too hard. Are you ready for the next stage? If so, let’s move on and draw the ...
Welcome back and thanks again for completing that last lesson. You’re doing great so far! Keep up the good work. Now that you have drawn the neck a couple of times, hopefully you...
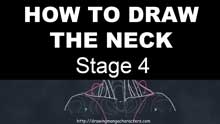
Welcome back and thanks for completing that last lesson. We’re almost done, so stay with me for just a little longer! For the last drawing, let’s draw the neck from the front again, ...
You can get in touch with me using the following button!
Send Me a Message!


A Personal Thank You from Yamada
Hi, my name’s Yamada and I wanted to take this time to personally THANK YOU for visiting this site and taking an interest in this school. It really means a lot to me that you’re giving me this chance to help you and I’m going to make sure it’s worth your time.
Through this school, I’m going to teach you everything I know about drawing. From anatomy to perspective, my goal as your friend is to create a series of lessons that you can easily follow to become an awesome artist!
However, a school is nothing without its students. Thus, I really need your help more than you need mine. Please let me know your thoughts on this school. Your feedback is very important to me, this school, and other students. Together, let’s turn this into the most awesome thing on the internet!
Your friend,
Yamada

Don’t you think we’d be AWESOME friends!?
Please let me know who you are using the following links!


